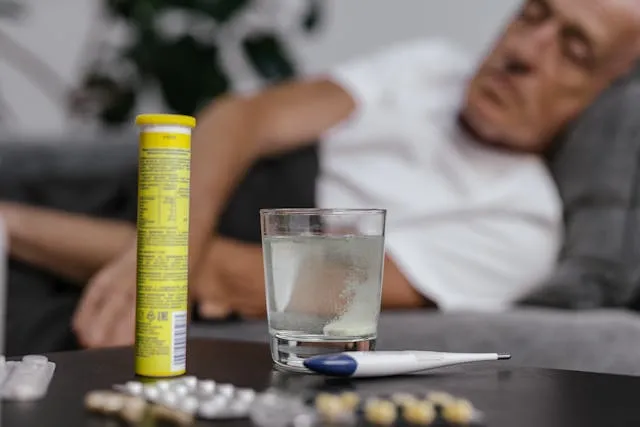
Cold Therapy at Home: Building Your Own Recovery Setup
Sore muscles and pain after workouts can slow you down. Studies show that cold therapy may help speed up your recovery and reduce swelling. This post will guide you on how to build a simple cold therapy setup at home for better health and faster healing.
Keep reading to learn how easy it is to get started.
Also Read: Steel Structures for Livestock Housing: Benefits and Design Tips
Key Components of a DIY Cold Therapy Setup
You need the right gear to set up cold therapy at home. Each part works together to keep your sessions safe, clean, and effective.
Water Chiller
A water chiller keeps your cold therapy tub at the right temperature. It pulls heat out of the water, letting you control how cold your ice bath gets. Most chillers cool water down to 37°F to 50°F, which is perfect for recovery and inflammation reduction.
A good chiller works best with tubs up to 100 gallons.
Cooler water means faster muscle recovery after tough workouts.
Some people use aquarium or hydroponics chillers for their DIY setup because these are affordable and easy to find online. Make sure your chiller has a pump strong enough to push water through the system without clogging.
Using a reliable chiller gives you steady cold immersion sessions at home for better wellness and pain relief.
Tub or Tank
Choosing the right tub or tank is key for your cold therapy setup. Look for a size that fits your space and needs. An ice bath should be big enough to hold water and allow you to submerge your body comfortably.
Many people use plastic tubs or inflatable models.
Make sure the material can handle cold temperatures well. Good options include sturdy plastic or fiberglass tanks. If you want something more permanent, consider installing a plunge tub designed specifically for cold immersion therapy.
Keep in mind how easy it is to access and fill with water, too; this will help make your recovery easier.
Water Pump and Filtration System
A water pump moves the cold water in your setup. This keeps the temperature consistent and helps with recovery. A good filtration system cleans the water. Clean water is important for safe cold therapy sessions.
Choose a filter that can handle the size of your tub or tank. Regularly check and change filters to avoid dirty water. This ensures you get all the health benefits from ice baths without any risks involved.
Next, learn how to set up your cold therapy equipment correctly for best results.
Safety Accessories
Safety accessories are key in a DIY cold therapy setup. You need to include items like non-slip mats and waterproof gloves. Non-slip mats keep you steady while getting in and out of the tub.
Waterproof gloves protect your hands from the cold water.
A timer is also helpful for tracking your session length. It helps you avoid staying too long in the ice bath. Always have towels nearby for quick drying after your treatment. Keeping safety in mind makes your home recovery more effective and enjoyable.
Step-by-Step Guide to Building Your Cold Therapy Setup
Building your own cold therapy setup is easier than you think. Follow a few simple steps for the best results. This guide will help you set up your ice bath at home. Keep reading to find out how!
Choose the Right Tub for Your Space
Choosing the right tub is key for your cold therapy setup. Consider the size of your space and how many people will use it. A plunge tub works well for individuals or small groups.
If you have more room, a larger tank may be better.
Look for a tub that has good insulation. This feature helps keep the cold water at a stable temperature longer. Make sure the material is sturdy and easy to clean too. You want something that can handle regular use without breaking down quickly.
Install the Chiller and Pump System
Start by placing the water chiller near your tub or tank. Connect it to your water source and make sure it fits well. The pump should move the cold water from the tank back into the chiller.
Use sturdy hoses for these connections to prevent leaks.
Next, follow the instructions that come with your equipment carefully. A good setup ensures constant cold water flow throughout your therapy session. Keep all parts secure to avoid any safety issues during use.
Cold therapy works best when everything runs smoothly together.
Set Up Filtration for Clean Water
After you install the chiller and pump system, it’s time to set up filtration for clean water. A good filtration system helps keep the water clear and free from dirt or bacteria.
Choose a filter that suits your tub size. Connect it to the water pump. Regularly check the filter for clogs and replace it when needed. Clean water enhances your cold therapy experience, promotes recovery, and prevents skin irritation.
Adjust and Maintain Optimal Temperature
Cold therapy works best at the right temperature. Aim for a range between 50°F to 60°F for optimal cooling effects. Check your water temp regularly using a thermometer. This helps maintain it in the ideal zone for recovery and inflammation reduction.
Use your chiller to adjust the water as needed. If you find it’s too warm, simply lower the setting on your chiller until it cools down. Regular checks help ensure consistent cold immersion and improve wellness during each use.
Tips for Using Cold Therapy Safely and Effectively
Cold therapy can help with recovery and pain relief. Use the right temperature and time to avoid any risks.
Recommended Temperature and Duration
Recommended temperatures and durations help ensure that cold therapy remains safe and effective. Below is a summary in table format:
| Goal | Temperature Range (°F) | Recommended Duration (minutes) | Details |
|---|---|---|---|
| General Recovery | 50 to 59 | 5 to 10 | Common for athletes; supports muscle relief |
| Advanced Adaptation | 45 to 50 | 2 to 5 | Lower temperatures; shorter sessions for experienced users |
| Beginner Sessions | 55 to 60 | 2 to 3 | Good starting point; allows the body to adapt |
| Wim Hof Method Training | 37 to 50 | 1 to 2 | Used in specialized practices; close monitoring needed |
| Post-Surgery Recovery | 50 to 59 | 10 to 15 | Often advised by doctors; always consult with healthcare providers |
Breathing Techniques for Comfort
Breath control is key during cold therapy. Deep breathing can help calm your mind and body. Focus on slow, steady breaths as you sit in the cold water. Inhale deeply through your nose, then exhale slowly through your mouth.
This process reduces stress and helps manage discomfort.
You can also try counting while you breathe. Count to four as you inhale, hold for a second, then count to six as you exhale. This simple technique keeps your focus away from the cold sensation.
Using these breathing techniques makes ice baths more bearable while enjoying their health benefits like pain relief and inflammation reduction.
Maintaining Your Cold Therapy Equipment
Keep your cold therapy setup clean and check the water quality often. Regular care helps your equipment work well and last longer.
Regular Cleaning and Water Quality Checks
Cold therapy needs care to stay safe and effective. Regular cleaning helps keep the water fresh.
- Check water quality every week. Use test strips to measure pH and chlorine levels. Clean water is vital for safe cold immersion.
- Change the water every two weeks. This prevents buildup of bacteria and algae. Fresh water enhances your recovery.
- Clean the tub or tank regularly. Use mild soap and a soft cloth to wipe down surfaces. Avoid harsh chemicals; they can harm you.
- Inspect filters often. Replace them as needed to ensure proper water flow and filtration. Clear filters help maintain good water quality.
- Look for any signs of mold or slime in the equipment. If you see any, clean it immediately to prevent health risks.
- Keep all parts dry when not in use. This avoids rust and damage to your setup over time.
- Store your setup in a cool, dry space when not in use. A dry environment helps prevent mold growth and keeps everything functioning well.
- Test the temperature before each use after cleaning or changing the water, ensuring optimal conditions for cold therapy and recovery benefits.
Troubleshooting Common Issues
Setting up cold therapy at home can lead to great recovery benefits. Sometimes, problems arise with the equipment. Here are some common issues and how to fix them.
- Chiller not cooling: Check if it’s plugged in. Make sure the water level is correct in the tub or tank.
- Water not circulating: Ensure all connections are tight; look for kinks in the hose. Clean the pump and filters often to keep water flowing smoothly.
- Tub leaks: Inspect for cracks or damaged seals in the tub or tank. Use waterproof tape to seal small leaks until you can replace the tub.
- Water too warm: Adjust temperature settings on your chiller; check its power supply. Add ice packs if needed for quick cooling.
- Bad smell from water: Change water regularly to prevent bacteria growth. Use chlorine tablets for cleaner water over time.
- Pump makes noise: Tighten any loose parts on the pump; oil any moving parts that require it. If noise persists, consider replacing the pump.
- Skin irritation after use: Check if you’re using safe temperatures; skin should never feel burned or too cold. Rinse off immediately after each session to remove any chemical residue.
Creating a dedicated space for your DIY cold plunge can enhance your recovery experience and make it more enjoyable.
- Equipment won’t turn on: Examine all cords and plugs; replace worn-out cords as needed. Try plugging into a different outlet to rule out power issues.
- Inconsistent temperature: Monitor using a thermometer; adjust settings if necessary for better control over your setup.
- Difficulty setting up: Follow manufacturer instructions carefully; seek online tutorials or guides for help with tricky installations.
Using these tips will help maintain your DIY cold therapy setup effectively while maximizing its health benefits.
Conclusion
Cold therapy at home is a great way to boost recovery. Creating your own setup can be easy and fun. With the right equipment, you will enjoy the benefits of cold immersion. Regular use helps reduce pain and inflammation.
Begin your journey to better wellness today!