
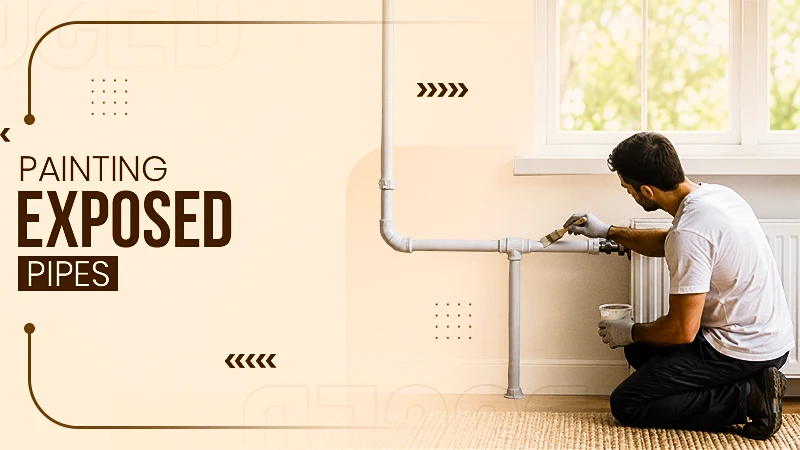
Can You Paint House Plumbing Pipes? Complete Guide to Safe and Long-Lasting Results
Painting plumbing pipes is a simple way to improve the appearance of exposed pipework without replacing it. Whether pipes run through a basement, bathroom, kitchen, garage, or utility room, a fresh coat of paint can help them blend into the surrounding space. However, painting plumbing requires more than choosing an attractive color. The type of pipe material, surface preparation, paint selection, and operating temperature all matter.
If you are planning a home improvement project, understanding which pipes can be painted and which products are suitable will help you achieve a neat finish without damaging your plumbing system.
Can You Paint House Plumbing Pipes?
Yes, you can paint most exposed household plumbing pipes, provided you use the correct preparation methods and paint for the pipe material. Copper, galvanized steel, cast iron, and certain plastic pipes can be painted with compatible products.
However, not every pipe should be treated the same way. Some pipes carry hot water, while others transport drinking water, wastewater, or gas. Their different functions and materials affect which coatings are appropriate.
For example, copper pipes generally need a suitable metal primer before painting. Plastic pipes may require a specialty primer designed to bond with their smooth surfaces. Applying ordinary wall paint directly to plumbing can result in peeling, cracking, or poor adhesion.
It is also important to remember that painting is a cosmetic improvement. It does not repair leaks, prevent serious corrosion, or make damaged plumbing safe.
Which Types of Plumbing Pipes Can Be Painted?
Before purchasing paint, identify the material used in your plumbing system.
1. Copper Pipes
Copper pipes are commonly found in residential water supply systems. They are durable and naturally resistant to corrosion, but their shiny appearance may not suit every interior design.
You can paint exposed copper pipes using a compatible metal primer and suitable topcoat. First, clean away dirt, grease, and oxidation. Lightly scuffing the surface can also improve paint adhesion.
Avoid painting over leaking joints or signs of significant corrosion.
2. PVC and Other Plastic Pipes
PVC pipes are frequently used for drainage and wastewater systems. Their smooth surfaces can make paint adhesion difficult.
Use a paint specifically labeled for the relevant plastic material. Some products require a compatible bonding primer, while others are formulated to adhere without one.
Never assume that every plastic pipe can be painted with the same product. Check the manufacturer’s instructions first.
3. Galvanized Steel Pipes
Galvanized steel pipes have a protective zinc coating that helps resist rust. Painting them is possible, but preparation is essential.
Clean the surface carefully and select a primer designed for galvanized metal. Avoid aggressive sanding that could damage the protective zinc layer.
If the pipe is heavily rusted, leaking, or deteriorating, have it inspected rather than simply covering the problem with paint.
4. Cast-Iron Pipes
Cast-iron pipes are often used in older drainage systems. Their dark, industrial appearance can be improved with a suitable metal coating.
Remove loose dirt and flaking material, then apply a compatible primer and durable topcoat. If there is extensive corrosion, arrange a plumbing inspection before painting.
What Paint Should You Use on Plumbing Pipes?
Choosing the right paint is one of the most important parts of the project. Different pipe materials require different coatings.
Consider these options:
- Metal primer: Helps paint bond to copper, steel, and other compatible metal surfaces.
- Acrylic paint: Can be suitable for certain prepared surfaces when the product specifically allows plumbing or metal applications.
- Oil-based enamel: Offers a durable finish for compatible metal pipes.
- Specialty plastic paint: Designed to adhere to certain PVC and plastic surfaces.
- Heat-resistant paint: May be necessary for specific hot surfaces, depending on the pipe temperature and manufacturer’s recommendations.
Always read the product label. A paint advertised as suitable for metal may not be appropriate for every plumbing application.
Also, never use ordinary decorative paint inside drinking-water pipes. Only products specifically certified for contact with potable water should be considered for that purpose, and painting the inside of household supply pipes is generally unnecessary.
How to Paint House Plumbing Pipes Step by Step
A successful painting project depends on careful preparation. Follow these steps to achieve a clean, professional-looking result.
Step 1: Inspect the Pipes
Examine the entire exposed section before starting. Look for leaks, loose connections, rust, cracks, and damaged insulation.
If you discover plumbing problems, arrange repairs before applying paint. Covering a problem can make future inspections more difficult.
Step 2: Clean the Surface
Remove dust, grease, cobwebs, and other debris using an appropriate cleaning solution. Allow the pipes to dry completely.
Clean surfaces help paint adhere properly and reduce the possibility of peeling.
Step 3: Prepare the Pipe Material
Different materials need different preparation techniques. Lightly scuff suitable metal surfaces if recommended by the primer manufacturer.
For plastic pipes, avoid aggressive sanding or chemical cleaners that could damage the material.
Step 4: Protect Nearby Areas
Use painter’s tape and drop cloths to protect walls, floors, fittings, valves, and surrounding fixtures.
Cover any identification labels or markings that need to remain visible. Do not paint over warning labels, inspection information, or important pipe identification.
Step 5: Apply the Appropriate Primer
Apply a thin, even coat of compatible primer where required. Follow the manufacturer’s drying time before proceeding.
Primer improves adhesion and can help create a more uniform finish.
Step 6: Apply the Paint
Now comes the decorative stage. If someone asks, can you paint house plumbing pipes, the answer is yes, but the final result depends on using a coating designed for the particular pipe material and conditions.
Apply thin coats rather than one thick layer. A small brush works well around joints and fittings, while suitable spray products can cover larger exposed sections.
Allow each coat to dry according to the manufacturer’s instructions.
Step 7: Allow Proper Curing
Do not rush the process. Paint may feel dry on the surface before it has fully cured.
Keep the area ventilated and avoid touching or disturbing the pipes until the coating has reached the recommended curing stage.
Important Safety Precautions Before Painting Plumbing
Although painting exposed plumbing is usually a manageable home improvement task, several precautions are important.
- Turn off nearby appliances or equipment if required by the paint manufacturer’s safety instructions.
- Maintain adequate ventilation when using solvent-based coatings.
- Keep paint away from open flames, pilot lights, and ignition sources.
- Never paint gas pipe connections, valves, regulators, or identification markings without approval from a qualified gas professional.
- Do not paint flexible connectors, moving joints, or components unless the manufacturer permits it.
- Avoid painting over pipe insulation because coatings may affect its performance.
- Do not use paint to conceal leaks or corrosion.
If your home has older plumbing with potentially hazardous coatings, including lead-containing paint, avoid sanding or disturbing it. Seek professional advice about safe testing and removal.
Benefits of Painting Exposed Plumbing Pipes
Painting plumbing pipes offers several practical and decorative advantages.
Improved appearance: Matching pipe colors to walls or ceilings can make exposed plumbing less noticeable.
Better interior design: Decorative colors can create an industrial-style appearance in basements, lofts, and utility spaces.
Affordable improvement: Painting is generally less expensive than replacing functional pipes simply for aesthetic reasons.
Surface protection: A compatible coating can provide an additional protective layer on certain metal surfaces when correctly applied.
However, paint should never be considered a substitute for proper plumbing maintenance or corrosion control.
Frequently Asked Questions (FAQs)
1. Can you paint copper plumbing pipes?
Yes. Copper pipes can be painted using a compatible metal primer and suitable topcoat. Clean and prepare the surface before applying paint.
2. Can you paint PVC plumbing pipes?
Yes, certain PVC pipes can be painted with products specifically designed for plastic surfaces. Check compatibility and manufacturer instructions before applying anything.
3. Should you paint hot water pipes?
You can paint some exposed hot-water pipes, but the coating must be rated for the pipe’s operating temperature. Allow the pipe to cool before preparation and follow product safety instructions.
4. Does painting plumbing pipes prevent rust?
A suitable protective coating can help protect compatible metal surfaces, but it cannot repair existing damage or replace proper corrosion protection.
5. Can you paint plumbing pipes in a basement?
Yes. Basement plumbing can be painted to improve the appearance of exposed ceilings and walls. However, inspect pipes for moisture, condensation, and leaks before beginning.
6. Can you paint over rusty plumbing pipes?
Minor surface rust may sometimes be treated using an appropriate metal preparation system. EVDANCE HOME CHARGING GUIDE However, deeply corroded or weakened pipes should be professionally inspected and potentially replaced.
7. How many coats of paint should plumbing pipes receive?
The number depends on the paint manufacturer’s instructions and the surface condition. Generally, a suitable primer followed by one or two thin topcoats provides a more consistent finish.
Final Thoughts
Painting exposed plumbing pipes can be an affordable and effective way to improve the appearance of your home. From copper supply lines to basement drainage pipes, the right preparation and compatible paint can produce a clean, attractive finish.
The most important thing is to identify the pipe material, inspect its condition, and choose products designed for the intended application. Never paint over leaks, serious corrosion, or important safety markings. When dealing with gas lines, unfamiliar materials, or damaged plumbing, consult a qualified professional before starting.
With careful planning and attention to safety, painting plumbing pipes can become a worthwhile part of a larger home improvement project.