Step-by-Step Guide to Installing a 16000 BTU Pool Heater
Nothing beats stepping into a warm pool—especially when the weather turns a little chilly. If you are considering improving your swimming pool setup, then adding a 16000 BTU heat pump to your above-ground pool is the best choice for maximum heating efficiency while remaining budget-friendly.
The best part is that the installation of a swimming pool heater will not require hiring any professional assistance. You can get the job done in just a few steps and save a lot of time and effort.
Let us explore some steps on how to install this equipment.
Why Choose a 16000 BTU Pool Heater?
Before moving on with the installation process, let’s find out why this heater is so great:
- Perfect for pools 4,000-5,000 gallons in volume in moderate climates (heats water ~2-4°F per day).
- More energy-efficient than gas-powered heating systems.
- Keep the temperature constant.
- Simple to install and take care of.
Imagine it’s like installing a thermostat in your pool – everything is perfect on its own.
Tools and Materials You’ll Need
Organizing everything beforehand will make your job easier. Here’s a list of what you will need:
- Set of screwdrivers
- Adjustable wrench
- PVC piping
- Hose clamps
- Teflon tape
- Flat surface to install the heater (a concrete slab or anything else solid enough)
Having them at hand will save you time.
Step 1: Choose the Right Location
Placement plays an important role in heating element effectiveness.
Select a location where your unit is:
- Adjacent to the pool pump and filtration systems.
- Well-ventilated
- Located on flat and steady ground
Pro tip: Ensure you leave a minimum gap of 2–3 feet all around the unit for effective ventilation. This will enhance heating element performance and ensure the longevity of your heating element.
Step 2: Switch Off Your Pool Systems
Safety comes first, always!
Before you begin:
- Switch off your pool pump.
- Shut down your power source.
- Release pressure from the system
Neglecting this step may result in leaks or electrical problems.
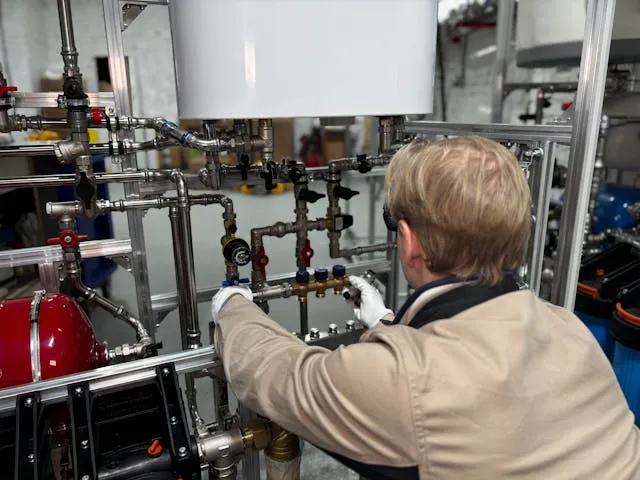
Step 3: Connect the Plumbing
This is the heart of the installation process.
Follow these easy steps:
- Identify the return line coming from your pool’s filter system.
- Cut the pipe at the point where you have chosen to install the heater.
- Connect the inlet and outlet pipes to the heater.
- Make use of clamps and Teflon tape in making the connections.
Did You Know? Proper water flow can improve overall heating element performance by up to 15%, ensuring faster and more even heating.
Quick Note: Water should flow from the filter → heater → pool. This ensures proper heating and smooth circulation.
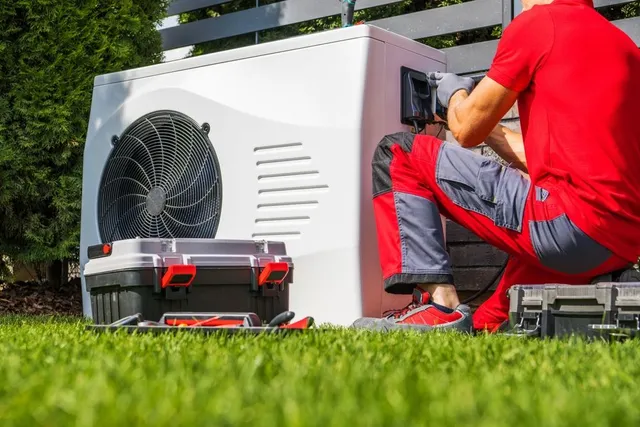
Step 4: Secure the Heater Unit
Position the heater unit on the surface you have prepared and ensure that it is leveled.
Why this is important:
- Eliminates vibrations
- Reduces noise
- Increases efficiency
You may need to install brackets for additional support if working in windy regions.
Step 5: Connect the Power Supply
The majority of pool heaters use a standard electrical power supply.
- Plug into a grounded outlet (or hardwire if 240V required—match unit specs).
- Make sure that the voltage matches the heater unit specification.
- Never use an extension cord.
If you are unsure how to perform the task, seek advice from an electrician.
Step 6: Check Water Flow
Turn the pool pump back on and let water circulate.
Inspect for:
- Leaking connections.
- Proper water flows through the heater.
If everything looks good, you’re ready for the next step.
Step 7: Turn On the Heater
Here’s where things get really interesting.
- Switch the heater on.
- Select your preferred temperature (usually 78-82°F).
- Let the heater run for a couple of hours.
And you’ll begin noticing the water gradually warming up—like a gentle sunrise for your pool.
Step 8: Monitor Performance
Here’s what you should keep an eye on in the next 24 hours:
- Temperature rise
- Noise levels
- Any unusual vibrations
This is just to make sure that everything is working perfectly fine from the very beginning.
Common Mistakes to Avoid
Simple setups can turn into disasters with improper planning. The following should be avoided:
- Placing the heater too far away from the pump.
- Obstructing airflow around the unit.
- Loose pipe connections.
- Incorrect water flow direction.
If these errors are prevented, efficiency might improve up to 20–30%, as per industry estimates.
Maintenance Tips for Long-Term Use
A little care goes a long way.
Weekly Checks:
- Inspect for leaks
- Clean debris around the unit
Monthly Tasks:
- Check water flow rate
- Inspect electrical connections
Seasonal Care:
- Drain the heater before winter.
- Cover the heater when it’s not in use,
Maintenance is important for the optimal performance of your equipment and also protects your investment.
Pro Tip: Routine maintenance may add up to 2 or 3 more years to the life span of your heater while providing reliable performance of the heating elements.
Real-Life Example
Consider a small family pool that is in constant use during the evenings. The water is too cool after the sun goes down because of the lack of a heater. After the installation of the 16000 BTU unit, the pool becomes warm and appealing; quick dips turn into leisurely activities.
That’s the difference the right setup can make.
Final Thoughts
While it may appear challenging to install the 16000 BTU heat pump, installing this equipment becomes relatively simple with step-by-step measures. Proper setup and care will enable you to achieve a smooth-running heating system for the pool without any future problems.
Imagine it as elevating your pool experience from “seasonal swimming” to “year-round enjoyment.”
All that remains afterward is to plunge into the pool and enjoy.