Bathroom Remodel Planning Practical Guide To Moisture Safety and Easy Care
Table Of Contents
- Start With The Main Problem
- Check The Room Before Choosing Finishes
- Plan For Moisture Control
- Choose Materials That Need Less Care
- Build Safety Into The Layout
- Make Small Bathrooms Work Harder
- Balance Style And Long-Term Value
- Set A Realistic Remodeling Budget
- Follow A Clear Remodeling Process
- Questions To Ask Before Work Begins
- Final Checklist
- Conclusion
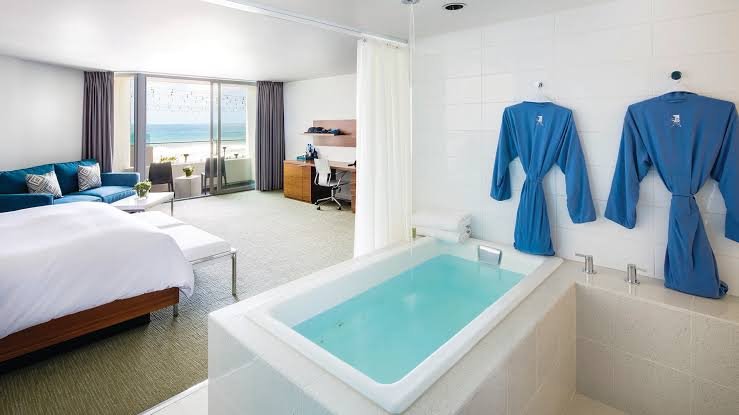
A bathroom remodel works best when it begins with everyday problems, not a color palette. Whether you are replacing worn finishes, improving accessibility, or exploring bathtubs San Diego, focus first on what makes the current room uncomfortable, hard to clean, or difficult to use.
Good planning helps a bathroom look better while also managing water, improving storage, and creating safer movement. A thoughtful project can reduce future repairs and make daily routines easier for everyone in the household.
Start With The Main Problem
List the frustrations you want the remodel to solve. You may need better lighting, more counter space, a shower that is easier to enter, less clutter, or surfaces that can withstand daily moisture. This step prevents attractive finishes from taking priority over practical needs.
- Does water collect on the floor after bathing?
- Is the room still damp long after a shower?
- Are drawers, doors, and fixtures awkward to use?
- Is there enough storage for daily items?
Check The Room Before Choosing Finishes
Inspect the existing room before finalizing the design. Look for ceiling stains, cracked grout, failing caulk, soft flooring, slow drains, and signs of leaks around the toilet, vanity, and tub. Confirm that doors and drawers can open without blocking the room’s natural walking path.
Cosmetic updates should never cover an active water problem. Address damaged framing, subflooring, plumbing, electrical concerns, or ventilation issues before installing new tile, cabinets, or paint.
Plan For Moisture Control
Bathrooms create humidity every day, so moisture management belongs at the center of the remodel. The EPA’s bathroom ventilation guidance emphasizes exhausting air outdoors, repairing leaks, and preventing water from reaching wall and floor cavities.
Key Moisture-Control Steps
- Select an exhaust fan appropriate for the room.
- Vent the fan directly outside, not into an attic or enclosed space.
- Use waterproof backing and reliable waterproofing methods in wet areas.
- Seal accessible plumbing, electrical, and ventilation openings.
- Run the fan during showers and afterward to clear lingering humidity.
Choose Materials That Need Less Care
Choose finishes based on water exposure, cleaning habits, and expected wear. Solid wall panels or larger tiles can reduce the number of grout lines to scrub. For flooring, prioritize water resistance and traction. Cabinets should have durable finishes that can handle splashes, while countertops benefit from stain resistance and minimal seams.
A showroom sample cannot show the full picture. The installation method, edge details, sealants, and maintenance requirements all affect how well a material performs over time.
Build Safety Into The Layout
Safety features are easier to include during planning than after construction. Slip-resistant flooring, clear paths, even lighting, handheld shower controls, and low-threshold shower entries can make the room more comfortable without making it look clinical. Flooring choices can affect the risk of slips, trips, and falls, making texture and traction important considerations in wet spaces.
Plan secure blocking behind shower walls, in case grab bars may be useful now or later. This allows strong mounting without opening finished walls after the remodel is complete.
Make Small Bathrooms Work Harder
Small bathrooms benefit from efficient storage and better sightlines. Consider recessed shelving where wall cavities allow, a vanity with drawers, a clear glass shower enclosure, and large-format wall materials that create fewer visual breaks. A narrower vanity and a recessed shower niche can often improve storage without changing the room footprint.
Balance Style And Long-Term Value
Use durable, flexible design choices for the room’s permanent parts. Neutral base colors, simple tile patterns, warm wood tones, classic fixture shapes, and layered lighting tend to age well. Add personality with mirrors, paint, towels, and accessories that are easy and inexpensive to change later.
Set A Realistic Remodeling Budget
Separate the budget into clear categories: planning, demolition, plumbing, electrical work, waterproofing, surfaces, fixtures, cabinetry, permits, cleanup, and final adjustments. Keep a contingency fund for hidden conditions, such as damaged subfloors, corroded pipes, or outdated wiring, that may only become apparent after demolition.
Follow A Clear Remodeling Process
- Define the problems and must-have improvements.
- Measure the room and review fixture clearances.
- Set the budget and identify optional upgrades.
- Choose the layout, then confirm materials are available.
- Review permits, schedule the work, and inspect completed details.
Questions To Ask Before Work Begins
- Who handles permits and inspections?
- How will wet areas be waterproofed?
- Where will the exhaust fan vent?
- What happens if hidden damage is discovered?
- Which materials, warranties, cleanup tasks, and changes are included in writing?
Final Checklist
- Identify the room’s biggest daily problems.
- Inspect for leaks, weak airflow, and damaged surfaces.
- Plan waterproofing and safety features before finishes.
- Select materials that fit real cleaning habits.
- Review the scope, schedule, payment plan, and contingency budget.
- Test fans, drains, lights, doors, and fixtures before sign-off.
Conclusion
A successful bathroom remodel is practical before it is decorative. When moisture control, safe movement, reliable materials, useful storage, and everyday routines guide the decisions, the finished space can remain comfortable, attractive, and easier to maintain for years.